Showing posts with label dust. Show all posts

Friday, November 13, 2015

Super Nintendo - From Yellow to Reborn

Sooooo, it took around 2 weeks to clean a SNES and it could have been shorter if we had sunny days... instead of natural UV light I had to use a UV light bulb which is not that efficient. Other than this the procedure was kinda the same as with the C64. Basically this is the short version of the SNES Story.

Longer version:
I was happy when I received the special screwdrivers and finally was able to dismount the SNES.
Everything started with a dirty-dusty, yellowed machine:


As I already mentioned in a previous post, it was fairly easy to clean the cartridge slot with earbuds and compressed air, so the SNES was in a good working condition but the plastic was, well, just look at the photo...

Disassembly is easy if you have the right tools:


However, I still don't understand why it was necessary to use 2 different type of screws (check previous post).

Surprisingly, the interior wasn't that dusty as I expected. A slight push of the compressed air bottle and a soft brush touch did the job well.


And then... no sunshine for days... what a sad week was that. I mounted the UV light to the slot, moved my bed from the bedroom to the kitchen and put the cardboard box into the bedroom.

For a few days only.
Then a bit more...

Cardboard box and aluminium foil interior, it helps to reflect the UV light to EVERYWHERE.


Switch on the UV light:


And we wait.

Still wait.

Even more...

After 6-7 days I was fed up with this procedure and cleaned the plastic parts from the cream, using a lot of warm temperature water in the bathtub.
Result:


After reassembly:


And... what is that..? Oh, no, again...


A leftover screw...
I have no idea where it belongs. Really. There were no empty slots, no holes, nothing. All I can think of this screw belongs to another device. Hopefully.

But at least the SNES works fine, I played with many games since I cleaned it.

Conclusion:
  • SNES disassembling is easy
  • UV light bulb s*cks. Should use natural UV light or a lot more powerful bulb.
  • Clean the plastic after 2 days and re-apply the cream again to achieve more even whitening
  • SNES parts are a bit harder to reassemble, it has more parts and it's a bit more complicated inside than a C64
  •  SNES is fun. SNES is a robust machine.
  • Aluminium foil is great, it reflects the UV light and spreads it everywhere.


.....


Today's slightly annoying music: Pac-Man DX soundtrack


Sunday, November 1, 2015

A Commodore 64 has reborn

You can read about the refurbishing of a Commodore Datasette in a previous post. It came together with a C64 C, both have been laying in the loft for many years. Try to imagine the yellowing of the case and the amount of dust inside... Let me help you with some photos:

Notice the yellowed keys and the dust, also the case was more yellow than the picture would suggest.

I started with disassembling the case and removed the keyboard and motherboard. Silly me forgot to take photos of the motherboard before cleaning... 
But I didn't forget to shot the keyboard:

I suppose it doesn't need much explanation... the dust must leave.

The case was kinda easy to clean, first it received a soapy massage with a lot of water splash from the showerheads. Afterwards the usual H2O2 treatment happened, luckily we had sunny days with a lot of sunshine.

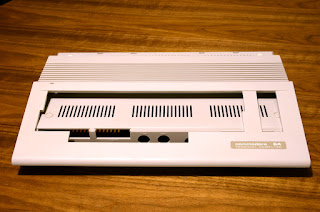
C64 case after soapy-water cleaning. This is still yellowed but thanks to the *fine* photo it's not really visible.

After 3 days on the balcony, 3-4 hours of sunshine daily. She's a beauty, isn't she?

In the meantime I was thinking of the keyboard parts, how to treat them with H2O2. I decided to use some aluminium-foil to cover the inside of a cardboard box and put the keys inside and cover them with cellophane:


Sadly, the sunny days were over (I did this procedure on another day, after the case has been cleaned), so I had to come up with another solution.

UV lightbulb! Yes. Ordered one and was waiting with a lot of patience.
Well, maybe being a monk would help to be more patient but this time I was simply working on a SNES until I received the UV light.

It's a simple one, 20W overall so I was thinking it might not be enough but it was:


The UV light is simply not as strong as the sunlight. Thank you, Captain Obvious.
It needs a lot more time to whiten the yellowed plastic but it worth the wait at the end because the result is good, and the UV light is more consistent than the sunshine. You can leave this on for days and the amount of light will be even on the plastic.

The keys got the light for 2 days, and I was 50% satisfied only:


They were definitely better but still had yellowing here and there. So, repeated the procedure, let the keys sniff in the UV light for 3 more days and the result after the second round was 100% satisfying.

In the meantime I cleaned the motherboard, it was just dusty but worked fine. Used a soft paintbrush to remove the dust and it was about time to reassemble the C64.

Luckily, I have another C64 on the shelf so it was relatively easy to put all the keys back to their original position:


The remaining procedure was simple again, putting everything together and test if everything works fine:


This time there were no leftover parts so I consider this refurbishing procedure as a big-big success:


Conclusion:
- sunshine is the best but a UV lightbulb is also good
- keys need more H2O2, their top is concave and the cream won't be even on the sides
- C64 <3
- uhm... electricity bill..?


.....


Today's music: Creatures 2 soundtrack